Embracing Rustic Kitchen Decor
Rustic kitchen decor creates a warm and inviting atmosphere, blending natural elements with a touch of vintage charm. It’s a style that celebrates the beauty of imperfection, embracing raw materials, and handcrafted details. Creating a rustic kitchen is more than just decorating; it’s about crafting a space that feels lived-in, comfortable, and full of character. This approach focuses on natural textures and aged finishes, allowing you to create a welcoming hub in your home. This guide will help you transform your kitchen into a haven of rustic beauty with eight easy DIY ideas.
What Defines Rustic Kitchen Style
Rustic kitchen design often incorporates natural materials such as wood, stone, and metal. The color palette tends to be earthy, with tones of cream, beige, brown, and muted greens. Elements of the style include exposed beams, reclaimed wood, vintage fixtures, and open shelving. The goal is to create a space that feels cozy, authentic, and connected to nature. The use of handcrafted items and vintage finds adds personality and a sense of history to the kitchen. The overall impression should be one of understated elegance and timeless appeal.
Key Elements of Rustic Kitchen Design

Several key elements define a rustic kitchen. Reclaimed wood is a cornerstone, often used for countertops, flooring, and shelving. Stone, whether used for backsplashes or countertops, adds texture and natural beauty. Vintage or antique fixtures, such as pendant lights and faucets, contribute to the charm. Open shelving allows for the display of rustic dishware and decor items. The use of warm, neutral colors and natural lighting enhances the cozy atmosphere. Incorporating these elements creates a cohesive and inviting rustic kitchen space.
DIY Idea 1 Repurposed Wood Shelves
Repurposed wood shelves are an excellent way to add rustic charm while providing practical storage. These can be made from reclaimed wood, barn wood, or even old pallets. The natural imperfections of the wood add character and visual interest. These shelves are perfect for displaying your favorite dishware, cookbooks, or decorative items, enhancing the rustic aesthetic. The simplicity of this project makes it accessible to DIY enthusiasts of all skill levels.
Finding the Right Wood
The best wood for your shelves depends on the look you want to achieve. Reclaimed wood offers a weathered, antique appearance. Barn wood provides a rugged texture and unique character. Pallets can be a budget-friendly option, but require thorough cleaning and sanding. Consider the wood’s grain, color, and any existing imperfections that add to its charm. Ensure the wood is sturdy enough to support the items you plan to place on the shelves.
Installation Tips

When installing the shelves, use sturdy brackets or shelf supports appropriate for the weight and type of wood. Ensure the brackets are securely fastened to the wall studs for maximum stability. Level the shelves carefully before attaching them. Consider adding a protective finish, such as a clear sealant or varnish, to protect the wood from moisture and stains, especially in a kitchen environment. The placement of the shelves should be both functional and visually appealing, complementing the overall rustic decor.
DIY Idea 2 Mason Jar Pendant Lights
Mason jar pendant lights are a charming and affordable way to add a touch of rustic elegance to your kitchen. These lights cast a warm and inviting glow, perfect for illuminating a kitchen island or dining area. The simplicity of the design allows for easy customization. This project provides a unique, personalized lighting solution. This project is ideal for adding a vintage-inspired look.
Gathering Materials
You’ll need mason jars (any size), pendant light kits (including sockets, wire, and canopies), wire strippers, and a screwdriver. Choose mason jars that complement your kitchen’s style. Select pendant light kits that match your decor. Make sure the wire gauge is appropriate for the wattage of the light bulbs you choose. Safety glasses are a must when working with electrical components.
Wiring and Assembly

Carefully follow the instructions on the pendant light kit to assemble the wiring. Thread the wire through the jar lid and connect the socket. Attach the canopy to the ceiling, ensuring the wiring is properly connected to the house electrical system. Screw the mason jar onto the lid. Install the light bulb and test the light to ensure it works correctly. Always double-check all connections for safety.
DIY Idea 3 Rustic Wooden Signage
Rustic wooden signage is an excellent way to add a personalized touch to your kitchen. These signs can feature quotes, family names, or even kitchen-themed phrases. Wooden signage adds warmth and a sense of personality to your rustic decor. This project is customizable, allowing you to create a unique piece that reflects your style. This is a fun and easy project that adds a unique and rustic feel to your kitchen.
Choosing Your Message
Select a message that resonates with your kitchen’s theme and your personal style. Popular choices include quotes about cooking, family, or food. You can also use family names or a simple “kitchen” or “eat.” The font style should complement the rustic aesthetic, opting for a vintage or hand-painted look. Ensure the message is clear and easy to read.
Creating the Sign

Use reclaimed wood or a piece of new wood that you can distress to achieve the desired look. You can paint the message freehand, use stencils, or create a vinyl decal. If painting freehand, practice beforehand to ensure accuracy. For a distressed look, sand the edges of the sign and apply a stain or paint, followed by light sanding. Finally, add a sealant or varnish to protect the sign and enhance its appearance. The final result will be a unique and charming addition to your kitchen.
DIY Idea 4 Antique Kitchen Utensil Display
Antique kitchen utensils can be transformed into a beautiful and functional display. Displaying these vintage tools adds a touch of history and character to your kitchen. This DIY project brings a unique vintage aesthetic to your kitchen. It also creates a visual focal point. This method provides a decorative and functional solution.
Sourcing Antique Utensils
Search flea markets, antique stores, and online marketplaces for antique kitchen utensils. Look for items with unique shapes, materials, and historical significance. Consider items like wooden spoons, whisks, ladles, and graters. Clean the utensils carefully, removing any dirt or debris. If you plan to use the utensils for food preparation, ensure they are food-safe or use them for decorative purposes only.
Displaying Your Collection

There are several ways to display your antique utensils. Hang them on a wall using hooks or a vintage rack. Arrange them in a decorative jar or vase on your countertop. Create a shadow box display to showcase your favorite items. Group similar utensils together for a cohesive look. The display should be both visually appealing and practical, adding a touch of vintage charm to your kitchen.
DIY Idea 5 Chalkboard Paint Wall
A chalkboard paint wall is a versatile and practical addition to any rustic kitchen. It provides a space for notes, grocery lists, or creative artwork. A chalkboard wall adds a unique and engaging element to the kitchen. This project is a creative outlet and allows for personalization. It adds a functional and stylish element to the kitchen.
Preparing the Surface
Choose a smooth, clean wall surface. Fill any holes or imperfections and sand the wall to ensure a smooth finish. Apply painter’s tape around the edges to protect adjacent areas. Clean the wall thoroughly to remove any dust or grease before painting. Proper surface preparation is essential for the chalkboard paint to adhere correctly and provide a smooth writing surface.
Painting and Decorating

Apply two to three coats of chalkboard paint, allowing each coat to dry completely. Use a brush or roller for even coverage. Once the paint is dry, season the chalkboard by rubbing chalk over the entire surface and then wiping it off. Decorate the chalkboard with drawings, messages, or weekly menus. You can change the designs as often as you like, making this a dynamic and adaptable element in your kitchen.
DIY Idea 6 Fabric Covered Canisters
Fabric-covered canisters can add a pop of color and texture to your rustic kitchen decor. This DIY project is a quick and easy way to personalize your kitchen storage. The custom canisters create a unique and stylish look in your kitchen. It is a simple DIY project, perfect for adding charm and functionality.
Selecting Fabrics
Choose fabrics that complement your kitchen’s color scheme and rustic style. Consider patterns like buffalo check, ticking stripes, or floral prints. Natural fabrics like cotton or linen work well. Measure the circumference and height of your canisters to determine the amount of fabric needed. Pre-wash and iron the fabric to prevent shrinkage and wrinkles.
Covering and Finishing

Cut the fabric to the appropriate size, leaving extra to wrap around the edges. Use fabric glue or hot glue to attach the fabric to the canisters, smoothing out any wrinkles. You can also use double-sided tape. Wrap the fabric around the canister and secure it, trimming any excess fabric. Finish the edges by folding them over and securing them with glue. Add embellishments like twine, ribbon, or buttons for added detail.
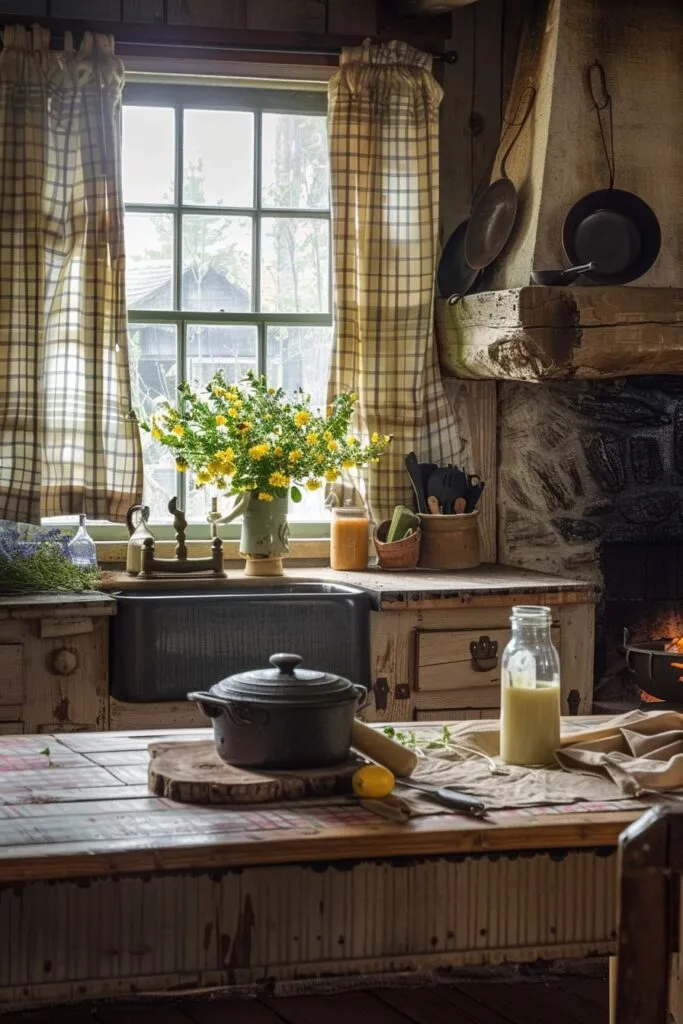
DIY Idea 7 Create a Farmhouse Sink
Farmhouse sinks are a quintessential element of rustic kitchen design, adding both style and functionality. Their deep basins and classic design create a focal point in the kitchen. The addition of a farmhouse sink significantly enhances the rustic appeal of your kitchen. This project gives your kitchen a timeless look.
What is a Farmhouse Sink
A farmhouse sink, also known as an apron-front sink, is characterized by its exposed front, which extends beyond the counter. These sinks are typically made of materials like porcelain, fireclay, or stainless steel. Their large size and deep basins make them practical for washing dishes and food preparation. The apron-front design adds a touch of traditional charm.
Finding and installing it
You can purchase a farmhouse sink from home improvement stores or online retailers. Ensure you have sufficient cabinet space to accommodate the sink’s depth and size. You may need to modify your existing cabinet to fit the sink. Follow the manufacturer’s instructions for installation, which usually involves securing the sink to the countertop and connecting the plumbing. Seek professional help if you are not comfortable with plumbing or carpentry.
DIY Idea 8 Wrought Iron Decor Elements
Wrought iron decor elements add a touch of elegance and durability to a rustic kitchen. These elements can include pot racks, candle holders, or decorative wall art. Wrought iron items add texture, style, and character to the kitchen. This project makes a bold design statement to any rustic kitchen.
Choosing Wrought Iron Pieces
Select wrought iron pieces that complement your kitchen’s decor. Consider items like pot racks to hang your cookware, candle holders to create a warm ambiance, or decorative wall art featuring nature-inspired designs. Ensure the pieces are durable and well-crafted. Choose items that fit your kitchen’s style, whether it’s modern, minimalist, or vintage.
Placement and Styling
Strategically place your wrought iron pieces to enhance the rustic aesthetic. Hang a pot rack above your kitchen island or stove for easy access to your cookware. Place candle holders on the countertops or shelves to add a warm glow. Arrange decorative wall art to create a focal point. Ensure the placement is both functional and visually appealing, tying together the overall rustic kitchen design.
Transforming your kitchen into a rustic haven is a rewarding experience. By incorporating these eight easy DIY ideas, you can create a space that is both beautiful and functional. Embrace the natural textures, warm colors, and vintage charm of rustic decor to create a kitchen you’ll love for years to come.